Printing on a Chandler & Price platen press
Posted on October 19 2016
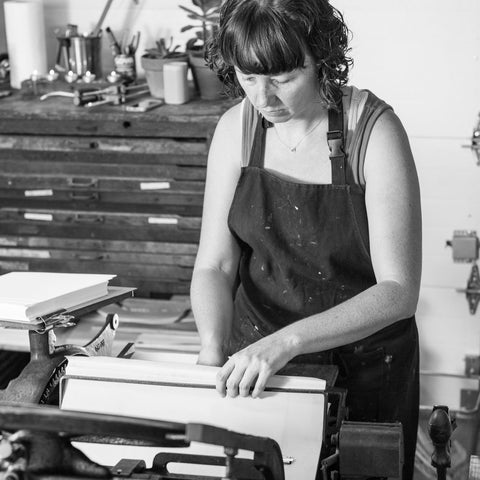
A few weeks back Ana from Side-A Photography came by the studio to photograph the printing process on my "new" Chandler & Price (C&P) platen press. Since the spring of 2016 I have slowly been perfecting my printing on the C&P.
Meet the press. She still needs a name...


She was built-in 1949, one of the youngest C&P presses. She weighs approximately a light 1 ton and took a little over a year to bring her back up to working speed. I added a new motor thanks to a neighbor who loved the challenge of hooking her up. The only issue with the motor, is that she still needs a push to start.

Let's get started...
When I start a new print job, I first hand-mix the ink. I use the Pantone (PMS) color guide to help determine the ink-color ratios.


Then I set-up the first plate, the press and adjust the packing. The packing determines the impression depth.
Just like on the Vandercock SP20, I have to check and adjust the registration of the printed image. The difference between the Vandercock and the C&P press are the paper guides. There is a slight difference on registration adjustment due to the different paper guides.


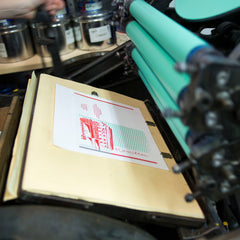
Once the image has correct registration. I can start the first color print-run. In this example, the first color is the red image of the card. In the pictures below you will notice there are 4 ink rollers. They rotate up and down collecting and distributing ink to the printing plate. The inking disc rotates to allow the ink to stay even through the printing cycle. I will add ink to the inking disc throughout the print-run. When the rollers are on the inking disc, the platen is closed, creating the impression on the paper. The rollers will then rotate down to distribute new ink to the plate and giving me time to insert a fresh piece of paper.


After the first image is printed on all of the desired number of pieces of Cranes Lettra, I clean the press to prepare for the second color print-run.


Then I switch the printing plates by first removing the red plate, then add the aqua plate. I use photo polymer printing plates for all of my printing jobs.


Next I set-up the second ink color on the press. It takes a few minutes for the rollers to distribute the ink evenly on the ink disc.


Then I line up the second plate to the first plates registration. Some days I am lucky and this process comes quickly. Other days it can take a long time to confirm correct registration on the second printing plate.

When the registration is perfect, I print the full run of paper and finish by cleaning the press.


Finished with printing!

I currently trim my cards at Baltimore Print Studios using their guillotine. Then each card is hand scored to create the middle fold line, folded and packaged.

A special thanks to Ana at Side-A Photography. If only we could had recorded the conversation during this photo shoot, you all would be amazed with how talented and fun to work with Ana is. I tend to be a serious printer concentrating on my craft. Ana was constantly making comments and cracking jokes in order to create the beautiful atmosphere she captured. Thank you Ana!
